By: W14-1 Since: Sept 2018 Licence: MIT
About this guide
This guide provides an overview of ClinicIO and walks you through the installation process. In addition, this guide provides in-depth documentation for all features.
This guide does not assume any prior technical knowledge. Check the Section 5, “FAQ” section for frequent user issues.
1. Introduction
ClinicIO is a desktop app to enable you to manage a clinic with ease and efficiency.
You can use ClinicIO to manage patient records, queues, medical inventory, appointments as well as view detailed statistics.
Head to the Section 2, “Installation Guide” to get started on install ClinicIO.
2. Installation Guide
This section is designed to help you to setup ClinicIO with 3 simple steps.
| You can move on to Section 3, “User Interface Walkthrough” if you have installed ClinicIO. |
Ensure you have Java version 9 or later installed in your Computer. |
Instructions:
-
Download the latest
clinicio.jarhere. -
Copy the file to the folder you want to use as the home folder for your ClinicIO.
-
Double-click
clinicio.jarto start the app. You should be able to view the window shown below.
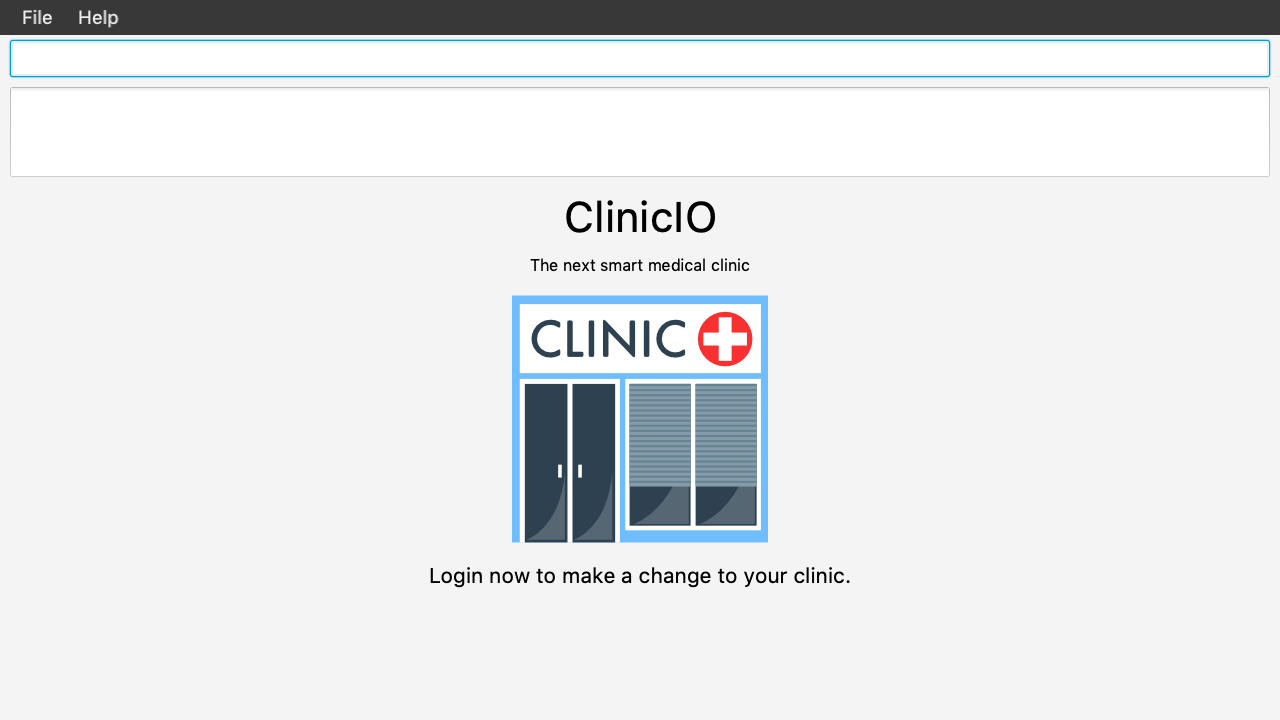
Type the command in the command box and press Enter to execute it.
e.g. typing help and pressing Enter will open the help window.
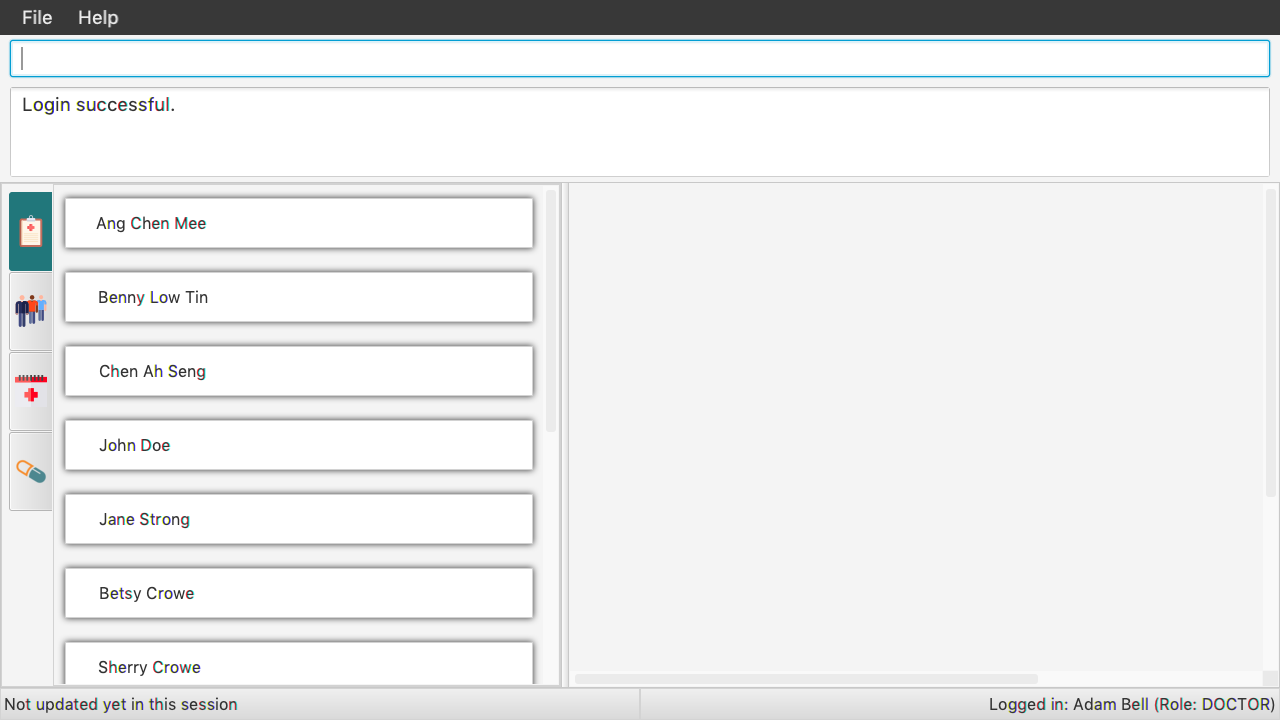
3. User Interface Walkthrough
This section is designed to help you familiarise with all of the user component in ClinicIO.
Here is an example of how ClinicIO looks like:

It consists of 9 parts: Menu Bar, Command Box, Result Display, Tab Pane, List Panel, Card, Display Panel Sync Status Bar, User Session Status Bar, each of the sections is explained as below.
3.1. Menu Bar
The Menu Bar provide you quick access to functions as below.
Here are the available options currently:
-
File: Provide access to file functions.
-
Exit: Exit the program.
-
-
Help: Show ClinicIO tutorial.
You can also press F1 to show ClinicIO tutorial.
3.2. Command Box
The Command Box allow you to enter command input.
3.3. Result Display
The Result Display provides you information with regards to the result of the command.
3.4. Tab Pane
The Tab Pane provides you with more accessibility to different areas of ClinicIO system.
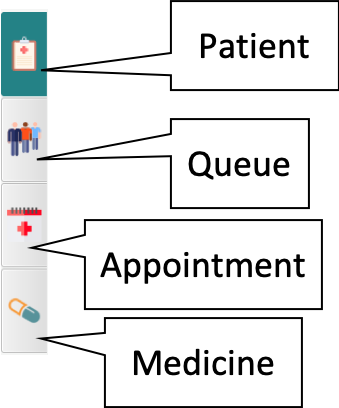
There are 4 tabs in the tab pane altogether. The sections are as follow:
-
Patient
-
Queue
-
Appointment
-
Medicine
3.5. List Panel
The List Panel displays a list of objects.
3.6. Card
The Card displays the object with minimal information.
3.7. Display Panel
The Display Panel displays the object in detail.
3.8. Sync Status Bar
The Sync Status Bar displays the last updated date and time of any changes to the data.
3.9. User Session Status Bar
The User Session Status Bar displays the current user session.
4. Features
This section is designed to provide a list of features that are implemented/working in progress to ease users in the day-to-day operations at the clinic.
As a doctor, you will be able to do the following:
-
View patient record
-
Enter patient additional medical information.
As a receptionist, you will be able to do the following:
-
Manage patient record
-
Manage clinic queue
-
Manage medicine inventory in the clinic
-
Manage future patient appointment
-
View statistics and export data.
Command Format
-
Words in
UPPER_CASEare the parameters to be supplied by the user e.g. inadd n/NAME,NAMEis a parameter which can be used asadd n/John Doe. -
Items in square brackets are optional e.g
n/NAME [t/TAG]can be used asn/John Doe t/friendor asn/John Doe. -
Items with
… after them can be used multiple times including zero times e.g.[t/TAG]…can be used ast/friend,t/friend t/familyetc. -
Parameters can be in any order e.g. if the command specifies
n/NAME p/PHONE_NUMBER,p/PHONE_NUMBER n/NAMEis also acceptable.
4.1. General Commands
4.1.1. Viewing help : help
You can view ClinicIO tutorial.
Format: help
You will be able to view ClinicIO guide (as below)
in a new window.
4.1.2. Listing entered commands : history
You can view all the commands that you have entered in reverse chronological order.
Format: history
|
Pressing the ↑ and ↓ arrows will display the previous and next input respectively in the command box. |
4.1.3. Clearing all entries : clear
You can clears all entries from the clinic record.
Format: clear
4.1.4. Undoing previous command : undo
You can restores ClinicIO to the state before the previous undoable command was executed.
Format: undo
|
Undoable commands: those commands that modify the clinic record’s content ( |
Examples:
-
deletepatient 1
listpatient
undo(reverses thedeletepatient 1command) -
selectpatient 1
listpatient
undo
Theundocommand fails as there are no undoable commands executed previously. -
deletepatient 1
clear
undo(reverses theclearcommand)
undo(reverses thedeletepatient 1command)
4.1.5. Redoing the previously undone command : redo
You can reverses the most recent undo command.
Format: redo
Examples:
-
deletepatient 1
undo(reverses thedeletepatient 1command)
redo(reapplies thedeletepatient 1command) -
deletepatient 1
redo
Theredocommand fails as there are noundocommands executed previously. -
deletepatient 1
clear
undo(reverses theclearcommand)
undo(reverses thedeletepatient 1command)
redo(reapplies thedeletepatient 1command)
redo(reapplies theclearcommand)
4.1.6. Exiting the program : exit
You can exit ClinicIO.
Format: exit
4.2. User Authentication
ClinicIO’s User Authentication ensure that clinic staff are provided with correct access rights.
Here are the list of commands:
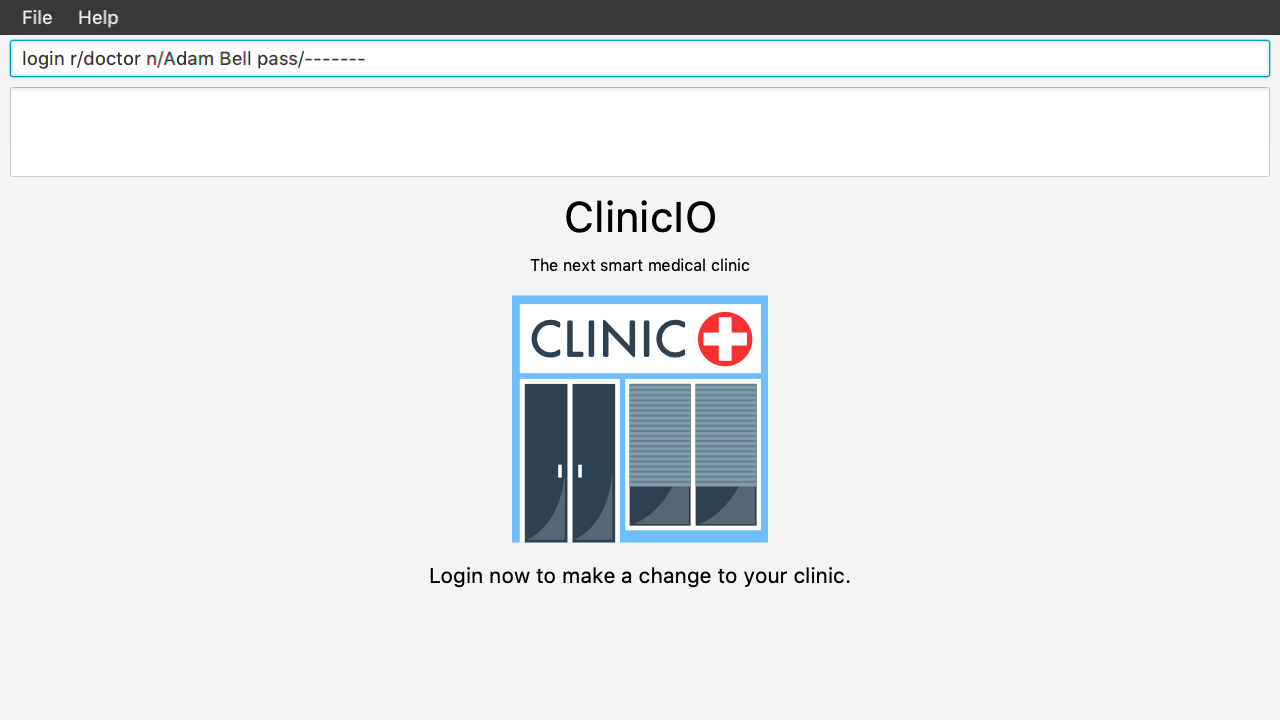
4.2.1. Login : login
You can login to ClinicIO.
Format: login r/ROLE n/NAME pass/PASSWORD
|
If you have already logged in, you cannot login again. |
Prior to logging in to ClinicIO, the ClinicIO user status will show that you have not logged in yet (Shown as below):
Once you have login successfully, the ClinicIO user status will be updated as below:
Examples:
-
login r/doctor n/Adam Bell pass/doctor1 -
login r/receptionist n/Mary Jane pass/reception3
4.2.2. Log out of the program : logout
|
You must log-in in order to use this feature. |
You can log out of ClinicIO.
Format: logout
Once you entered the logout command, you will be redirected back to the startup page.
4.3. Patient Management
ClinicIO provides a centralised patient management system to allow you to manage the clinic’s patient record more efficiently.
Here are the list of commands:
4.3.1. Adding a patient: addpatient
|
You must log-in as a receptionist in order to use this feature. |
You can add a patient to the clinic record.
Format: addpatient n/NAME ic/NRIC p/PHONE_NUMBER e/EMAIL a/ADDRESS [medProb/MEDICAL_PROBLEMS]… [med/MEDICATIONS]… [alrg/ALLERGIES]… [preDr/PREFERRED_DOC]
You just need to type in the addpatient command as shown below:

Then, the new patient will be added to the list as shown below:
|
A patient can have any number of medical problems, medications, allergies (including 0) |
| A patient does not need to choose a preferred doctor. |
| You must choose a preferred doctor that exists inside ClinicIO record. |
Examples:
-
addpatient n/John Doe ic/S1234567D p/98765432 e/johnd@example.com a/John street, block 123, #01-01 alrg/Dairy Products -
addpatient n/Betsy Crowe ic/S2231414A e/betsycrowe@example.com a/Newgate Prison p/1234567 medProb/High Blood Pressure med/Chlorothiazide
4.3.2. Deleting a patient : deletepatient [coming in v2.0]
You can delete the specified patient from the clinic record.
Format: deletepatient INDEX
Examples:
-
list
deletepatient 2
Deletes the 2nd patient in the clinic record. -
find Betsy
deletepatient 1
Deletes the 1st patient in the results of thefindcommand.
4.3.3. Editing a patient : editpatient [coming in v2.0]
You can edit an existing patient in the clinic record.
Format: editpatient INDEX [n/NAME] [ic/NRIC] [p/PHONE_NUMBER] [e/EMAIL] [a/ADDRESS] [medProb/MEDICAL_PROBLEMS]… [med/MEDICATIONS]… [alrg/ALLERGIES]… [preDr/PREFERRED_DOC]
Examples:
-
editpatient 1 p/91234567 e/johndoe@example.com
Edits the phone number and email address of the 1st patient to be91234567andjohndoe@example.comrespectively. -
editpatient 2 n/Betsy Crower t/
Edits the name of the 2nd patient to beBetsy Crowerand clears all existing tags.
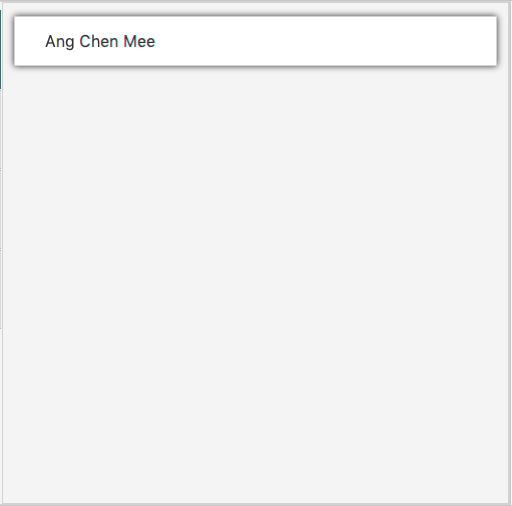
4.3.4. Locating patients by name: findpatient
You can find patients whose names contain any of the given keywords.
|
You must login in order to use this feature. |
Format: findpatient KEYWORD [MORE_KEYWORDS]
You just need to type in the findpatient command as shown below:

Then, any patient that matches the keywords will be displayed as shown below:
Examples:
-
findpatient John
ReturnsjohnandJohn Doe -
findpatient Betsy Tim John
Returns any patient having namesBetsy,Tim, orJohn
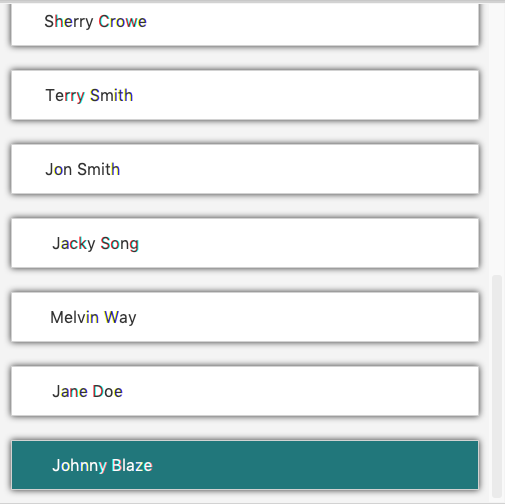
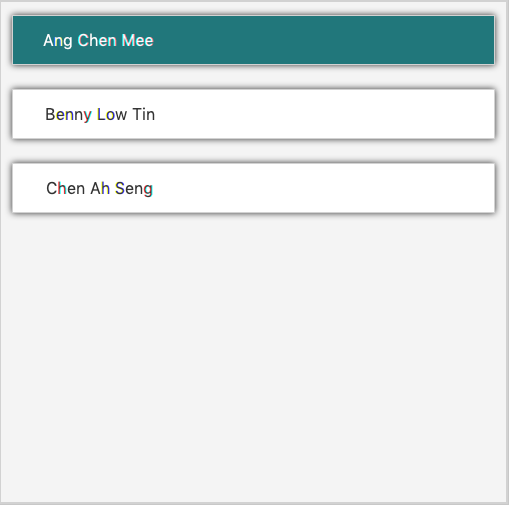
4.3.5. Listing all patients : listpatient
You can view a list of all patients in the clinic record.
|
You must login in order to use this feature. |
Format: listpatient
You just need to type in the listpatient command as shown below:

Then, all patients will be displayed as shown below:
4.3.6. Selecting a patient : selectpatient [coming in v2.0]
Selects the patient identified by the index number used in the displayed patient list.
Format: selectpatient INDEX
Examples:
-
list
selectpatient 2
Selects the 2nd patient in the clinic record. -
find Betsy
selectpatient 1
Selects the 1st patient in the results of thefindcommand.
4.4. Queue Commands
4.4.1. Assign a patient into the queue : enqueuepatient
Assigns the patient based on the index number used in the displayed patient list.
Format: enqueuepatient INDEX
The command is typically used in combination with other commands.
Examples:
-
list
enqueuepatient 7
Selects the 7th patient in the displayed list of patients resulting from thelistcommand and assigns the patient into the queue. -
find Logan
enqueuepatient 1
Assigns the 1st patient in the displayed list of patients whose names contain Logan (case insensitive) resulting from thefind Logancommand and assigns the patient into the queue.
4.4.2. Show all patients in the queue : showqueue
Lists all patients in the queue.
Format: showqueue
Example:
-
showqueue
4.4.3. Removing a patient from the queue: dequeuepatient INDEX
Pulls out the patient based on the index number used in the displayed patient list.
Examples:
-
dequeuepatient 9
Removes the 9th patient in the ClinicIO record from the queue.
The command can also be used in combination with other commands such as list and find.
Examples:
-
list
dequeuepatient 3
Removes the 3rd patient in the displayed list of patients from the queue. -
find Cassandra
dequeue 1
Selects the 1st Cassandra as displayed in the list resulting from thefind Cassandracommand and removes her from the queue.
4.5. Data Management
4.5.1. Analytics
The analytics feature allows users to view statistics across the various functions of a clinic. These are viewed in isolation with separate commands for each department. However, they share a similar user interface composed of two distinct sections. They are the summary and the visualizations as shown in the following screenshot:
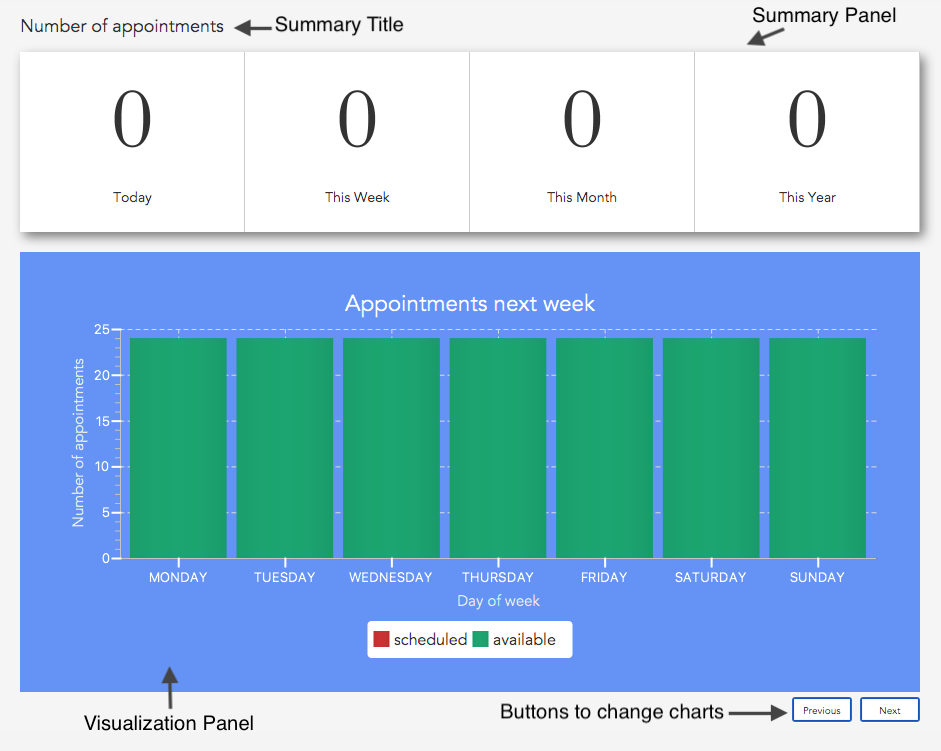
Summary
The summary displays the number of occurrences of events such as the Number of appointments in the screenshot above.
They can be raw totals or averages. This will be indicated by the title. The numbers are categorized according to the
following time periods:
-
Today: The occurrences on the present real life date. -
This Week: The occurrences in the present real life week spanning from Monday to Sunday. -
This Month: The occurrences in the present real life month. -
This Year: The occurrences in the present real life year.
Visualizations
The pane below the summary displays visualizations. There may be multiple visualizations which can be cycled through
using the Next and Previous buttons. The visualizations may be either one of a vertical bar chart, horizontal bar
chart, vertically stacked bar chart or a line chart.
4.5.2. Analytics Commands
The following commands can be used to display the different types of statistics.
Displaying patient statistics : patientstats
Displays the following information about patients:
Format: patientstats
Displaying appointment statistics : apptstats
Displays the following information about appointments:
Format: apptstats
Displaying doctor statistics : doctorstats
Displays the following information about doctors:
Format: doctorstats
4.5.3. Exporting Patient Data
ClinicIO allows the exporting of patient related data to Comma Separated Values (csv) files. The filenames are predetermined and specific to the type of data being exported. The files are generated in the same file directory as the program.
4.5.4. Export Commands
The following commands can be used to export the different types of patient data.
Exporting patient personal information : exportpatients
Exports all patients' personal information to a csv file named ClinicIO_patientdata.csv.
Format: exportpatients
The personal information consists of the following fields, in order:
Exporting patients appointment records : exportpatientsappointments
Exports all patients' appointment records to csv file named ClinicIO_patientsappointments.csv.
Format: exportpatientsappointments
Each appointment record consists of the following fields, in order:
Go to Section 4.7, “Appointment Commands” for more details on appointments.
Exporting patients consultation records : exportpatientsconsultations
Exports all patients' consultation records to csv file named ClinicIO_patientsconsultations.csv.
Format: exportpatientsconsultations
Each consultation record consists of the following fields, in order:
4.6. Medicine Inventory Commands
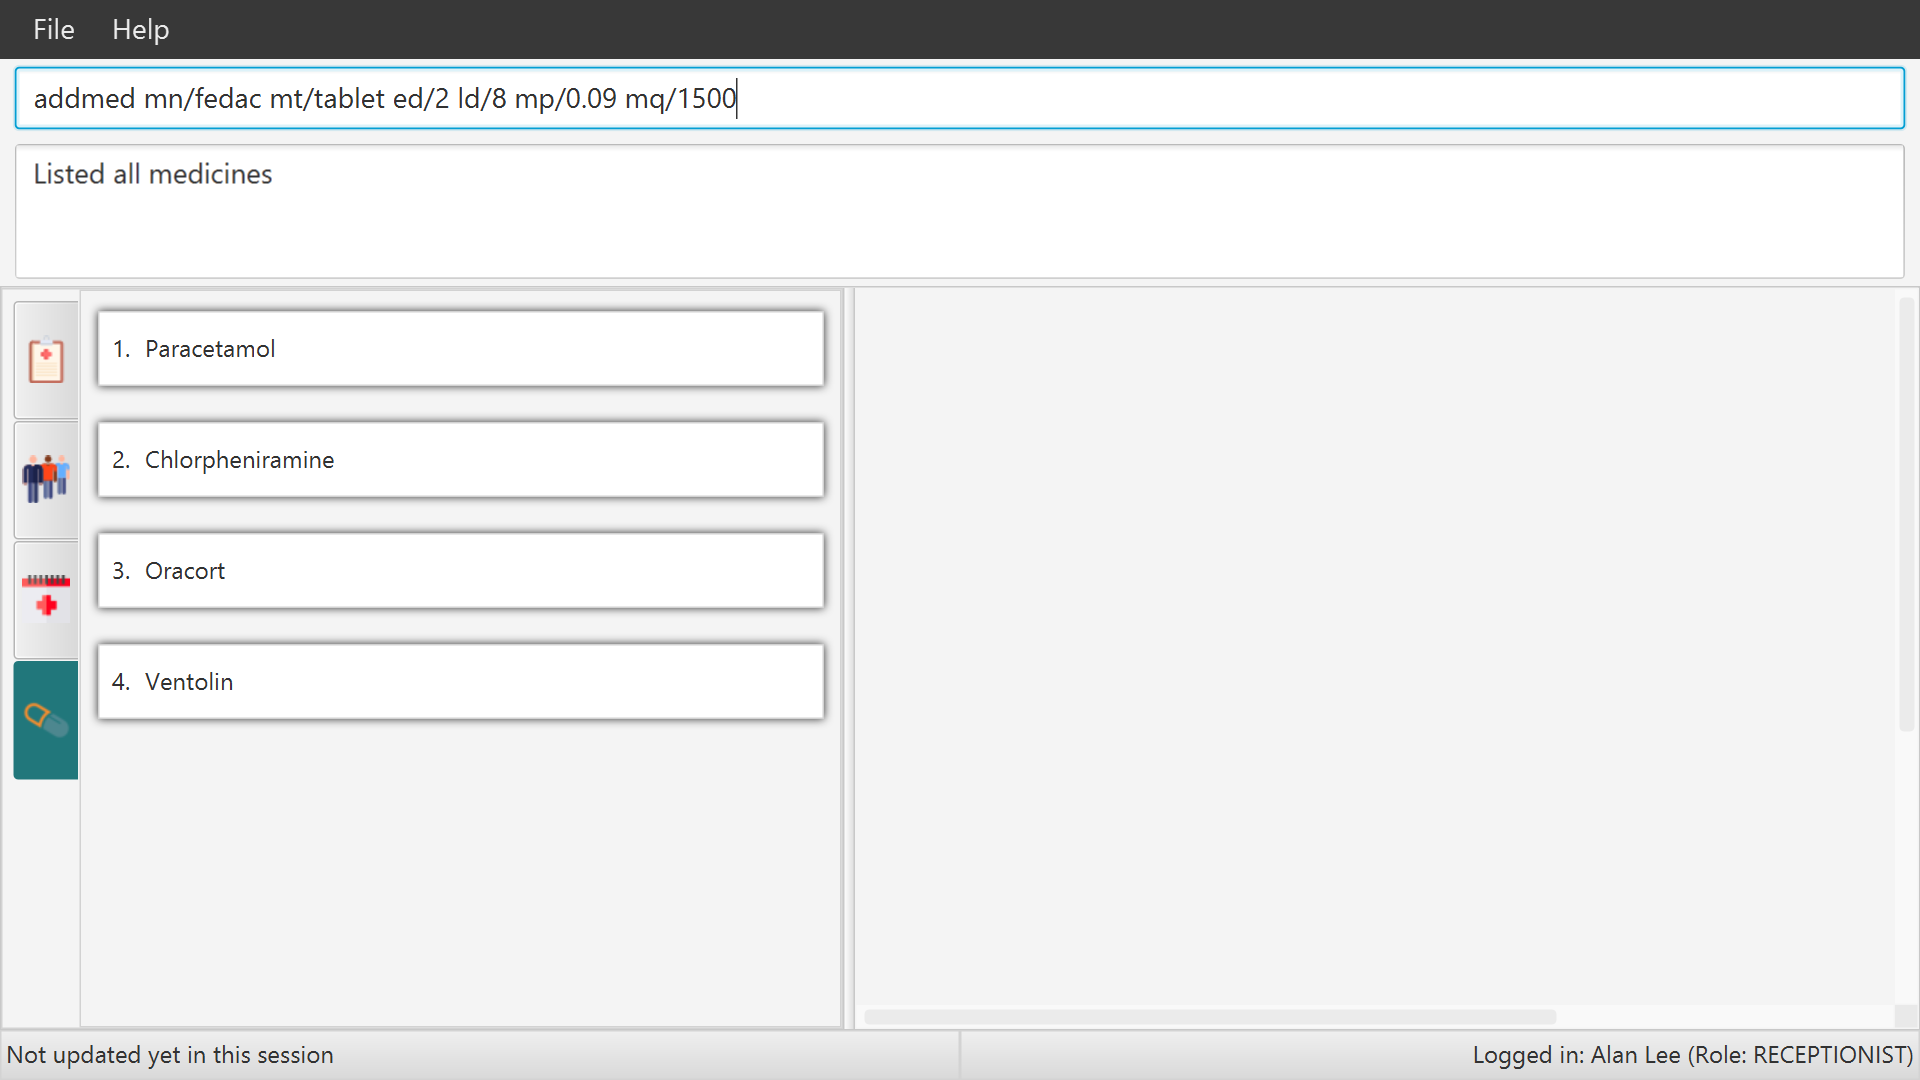
4.6.1. Adding a medicine: addmed
Adds a medicine to the medicine inventory
|
You must log-in as a receptionist in order to use this feature. |
Format: addmed mn/MEDICINE_NAME mt/MEDICINE_TYPE ed/EFFECTIVE_DOSAGE ld/LETHAL_DOSAGE mp/PRICE mq/QUANTITY
The lethal dosage of a Medicine should be more than its effective dosage.
|
Example:
-
addmed mn/fedac mt/tablet ed/2 ld/8 mp/0.09 mq/1500
Usage: (refer to screenshots below)
-
Enter the command in the correct format to add a medicine to the medicine inventory.
-
After successfully entering the command, you will see the newly added medicine in the displayed list of medicines.

4.6.2. Finding a medicine by name: findmed
Find a medicine in the medicine inventory
Format: findmed MEDICINE_NAME
Example:
-
findmed ibuprofen
Returns the details ofIbuprofen
4.6.3. Listing all medicines: listmed
Displays a list of all the medicines in the medicine inventory.
Format: listmed
Example:
-
listmed
Usage: (refer to screenshot below)
-
After successfully entering the command, you will see a list of medicines in the medicine inventory.
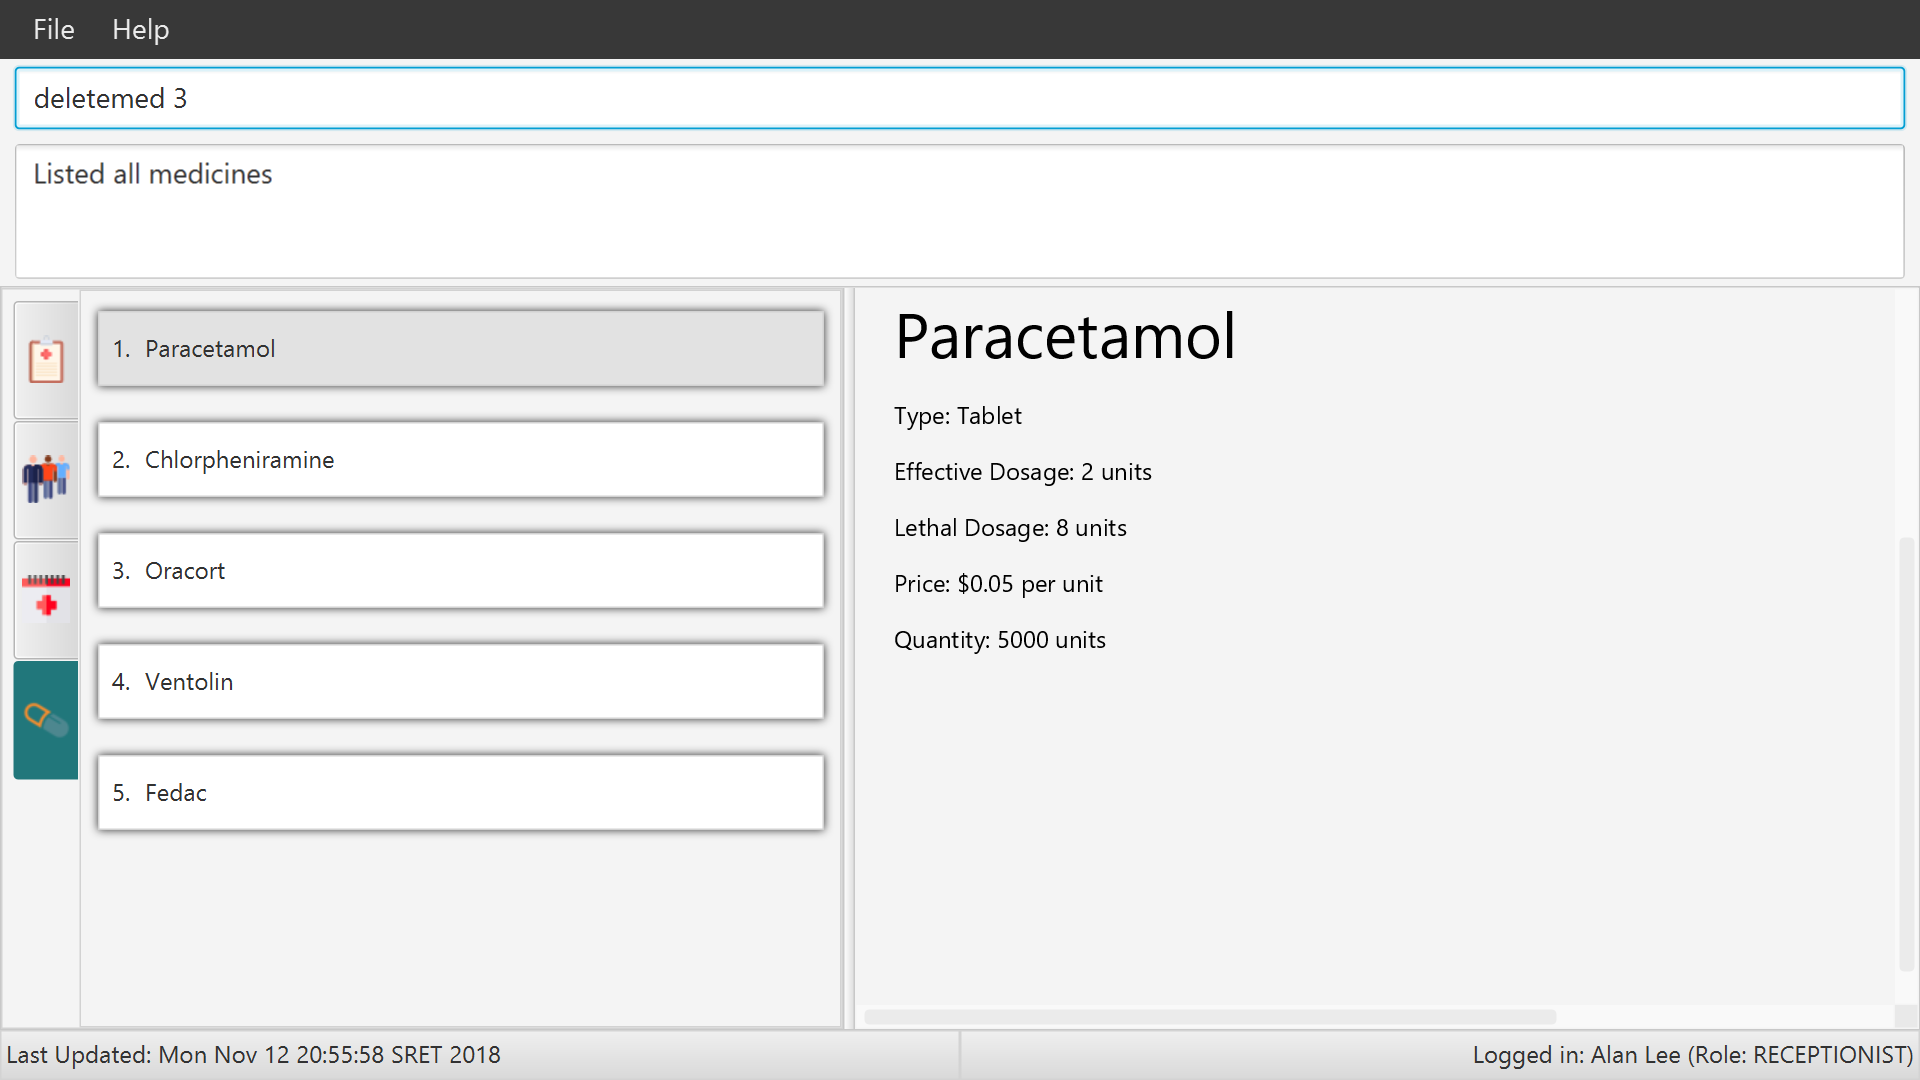
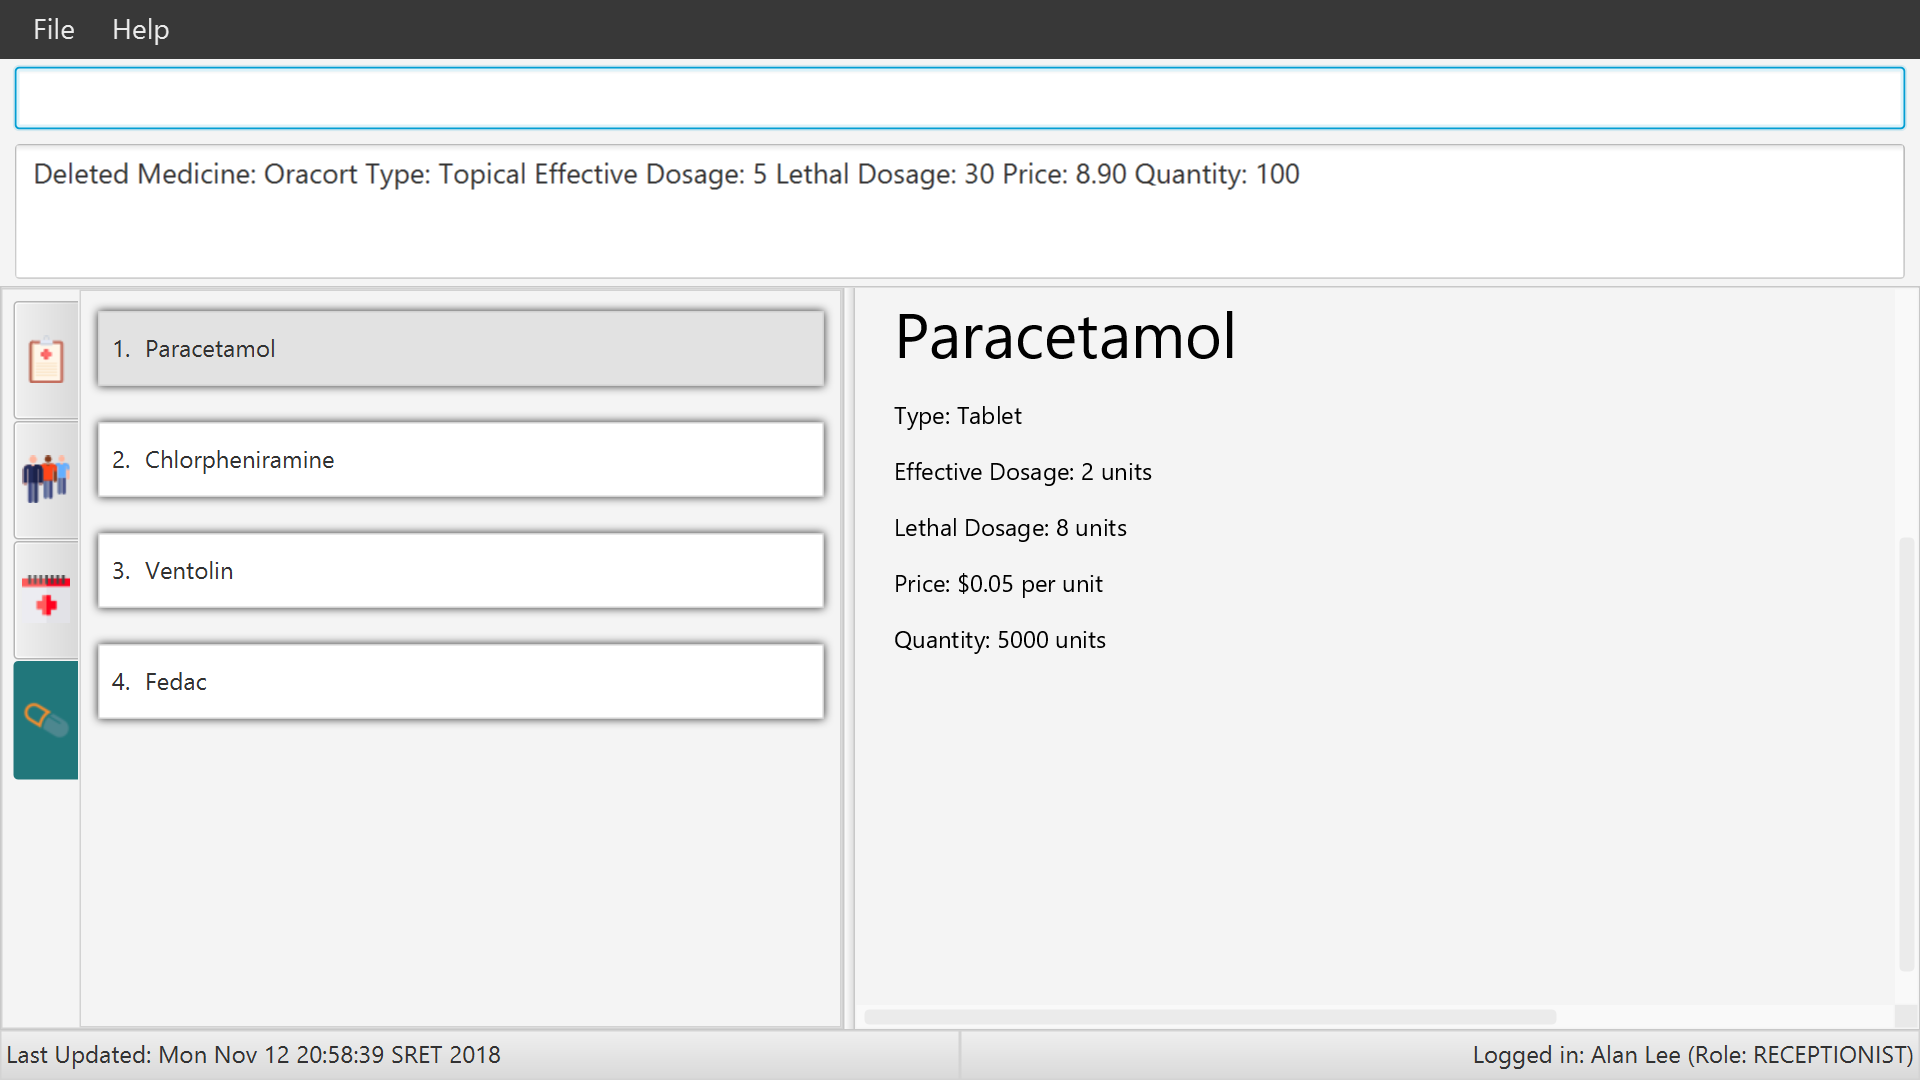
4.6.4. Removing a medicine by index : deletemed
Removes the specified medicine from the medicine inventory.
|
You must log-in as a receptionist in order to use this feature. |
Format: deletemed INDEX
Example:
-
listmed
Displays list of medicines in the medicine inventory. -
deletemed 1
Removes the first entry in the list of medicines.
Usage: (refer to screenshots below)
-
Enter the command in the correct format to remove a medicine from the medicine inventory.
-
After successfully entering the command, you will see the updated displayed list of medicines without the removed medicine.
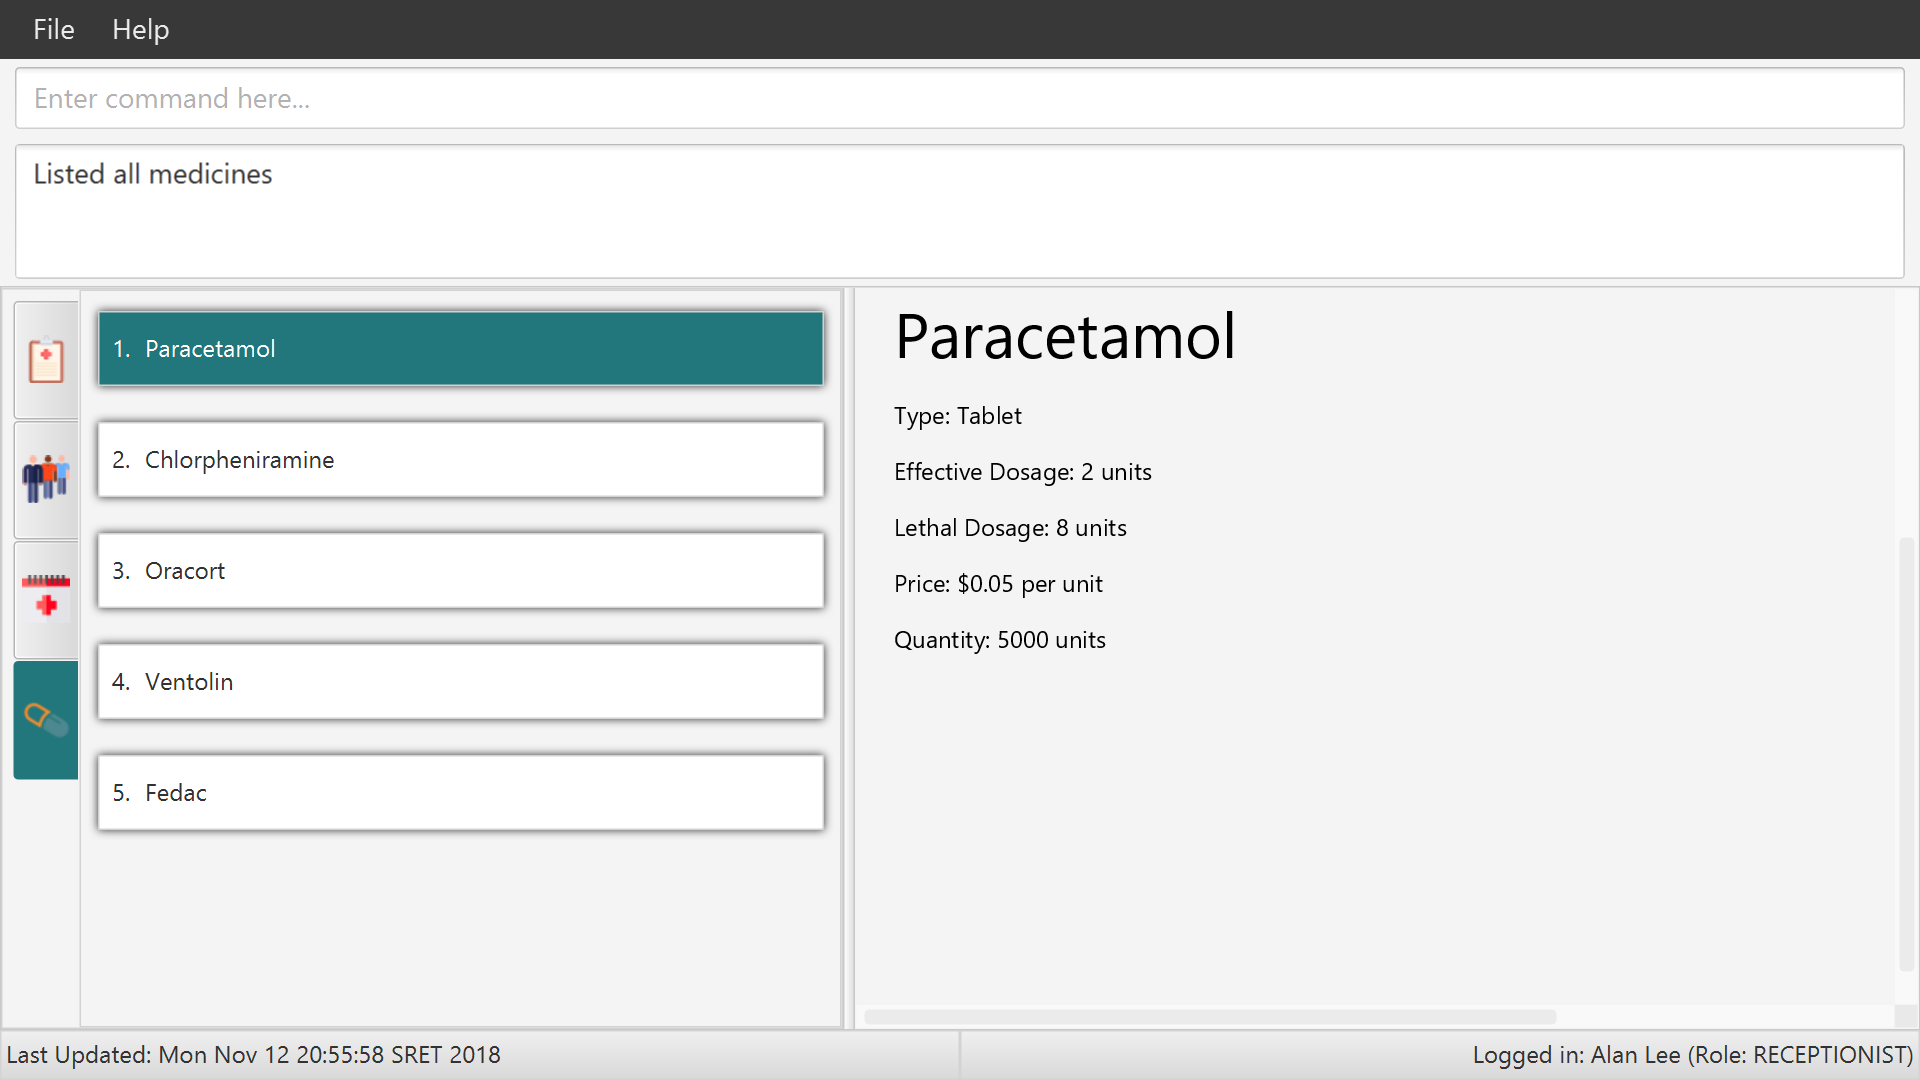
4.6.5. Selecting a medicine by index : selectmed
Selects the specified medicine in the displayed list of medicines.
Format: selectmed INDEX
Example:
-
listmed
Displays a list of medicines in the medicine inventory. -
selectmed 3
Selects the third entry in the list of medicines.
4.6.6. Increasing quantity of a medicine : increasemed [coming in v2.0]
Increases the quantity of the specified medicine in the displayed list of medicines.
Format: increasemed INDEX mq/QUANTITY
Example:
-
listmed
Displays a list of medicines in the medicine inventory. -
increasemed 3 mq/500
Increase the quantity of the third entry in the list of medicines by 500 units.
4.6.7. Decreasing quantity of a medicine : decreasemed [coming in v2.0]
Decreases the quantity of the specified medicine in the displayed list of medicines.
Format: decreasemed INDEX mq/QUANTITY
Example:
-
listmed
Displays a list of medicines in the medicine inventory. -
decreasemed 2 mq/10
Decrease the quantity of the second entry in the list of medicines by 10 units.
4.7. Appointment Commands
4.7.1. Adding appointments: addappt
Adds an appointment to the appointment schedule.
Format: addappt d/DATE tm/TIME tp/[followup/new] n/NAME ic/NRIC p/PHONE e/EMAIL a/ADDRESS t/TAGS
|
Date is in dd mm yyyy format and time is hh mm in military time. |
|
Tags are optional. |
Examples:
-
addappt d/03 04 2018 tm/16 45 tp/followup n/John Doe ic/S1111111G p/98765432 e/johnd@example.com a/311, Clementi Ave 2, #02-25 t/fever
Adds a follow-up appointment scheduled on 3 April 2018 at 4.45pm for John Doe with IC S1111111G. -
addappt d/12 12 2013 tm/1300 tp/new id/100 n/Sally Bower ic/G3333333H p/98765432 e/johnd@example.com a/311, Clementi Ave 2, #02-25
Adds a new appointment scheduled on 12 December 2013 at 1.00pm for Sally Bower with IC G3333333H.
4.7.2. Listing Appointments by Day: listappt
Shows a list of all the appointments for the specified day.
Format: listappt d/DATE
| Date, like in addappt, is in dd mm yyyy format. |
Examples:
-
listappt 02 03 2017
Lists all appointments on 2 March 2017. -
listappt 01 01 2000
Lists all appointments on 1 January 2000.
4.7.3. Listing All Appointments: listallappt
Shows a list of all appointments.
Format: listallappt
4.7.4. Cancelling Appointments: cancelappt
Cancels an appointment from the appointment schedule.
Format: cancelappt INDEX
Examples:
-
listappt d/03 04 2018
cancelappt 1
Cancels the 1st appointment in the list. -
listappt d/12 12 2018
cancelappt 4
Cancels the 4th appointment in the list.
5. FAQ
This section is designed to help you answer any issues that are frequently asked by others.
-
How do I transfer my data to another Computer?
Install the app in the other computer and overwrite the empty data file it creates with the file that contains the data of your previous ClinicIO folder.
-
How to save data in ClinicIO?
There is no need for you to save manually. ClinicIO will automatically save data to the hard disk after any command that changes the data.
6. Command Summary
This section is designed to provide a comprehensive list of commands for you.
6.1. General commands
-
Clear :
clear -
Help :
help -
History :
history -
Redo :
redo -
Undo :
undo
6.2. User Authentication Commands
-
Login :
login r/ROLE n/NAME pass/PASSWORD
e.g.login r/doctor n/Adam Bell pass/doctor1 -
Logout :
logout
6.3. Patient Management Commands
-
Add patient
addpatient n/NAME ic/NRIC p/PHONE_NUMBER e/EMAIL a/ADDRESS [medProb/MEDICAL_PROBLEMS]… [med/MEDICATIONS]… [alrg/ALLERGIES]… [preDr/PREFERRED_DOC]
e.g.addpatient n/John Doe ic/S1234567D p/98765432 e/johnd@example.com a/John’s Lane, block 123, #01-01 alrg/Dairy Products -
Delete patient :
deletepatient INDEX
e.g.deletepatient 3 -
Edit patient :
editpatient INDEX [n/NAME] [ic/NRIC] [p/PHONE_NUMBER] [e/EMAIL] [a/ADDRESS] [medProb/MEDICAL_PROBLEMS]… [med/MEDICATIONS]… [alrg/ALLERGIES]… [preDr/PREFERRED_DOC]
e.g.editpatient 2 n/James Lee e/jameslee@example.com -
Find patient :
findpatient KEYWORD [MORE_KEYWORDS]
e.g.findpatient James Jake -
List all patients :
listpatient -
Select patient :
selectpatient INDEX
e.g.selectpatient 2
6.4. Queue Commands
-
Show patients in the queue :
showqueue
e.g.showqueue -
Enqueue a patient :
enqueuepatient INDEX
e.g.enqueuepatient 3 -
Remove a patient from the queue :
dequeuepatient INDEX
e.g.dequeuepatient 4
6.5. Data Commands
-
Patient Statistics :
patientstats -
Appointment Statistics :
apptstats -
Doctor Statistics :
doctorstats -
Medicine Statistics :
medstats -
Export all patients' personal information :
exportpatients -
Export all patients' appointment records :
exportpatientsappointments -
Export all patients' consultation records :
exportpatientsconsultations
6.6. Medicine Inventory Commands
-
Add Medicine :
addmed mn/MEDICINE_NAME mt/MEDICINE_TYPE ed/EFFECTIVE_DOSAGE ld/LETHAL_DOSAGE mp/PRICE mq/QUANTITY
e.g.addmed mn/Paracetamol mt/tablet ed/2 ld/8 mp/0.05 mq/1000 -
Find Medicine :
findmed MEDICINE_NAME
e.g.findmed Paracetamol -
List Medicine :
listmed
e.g.listmed -
Delete Medicine :
deletemed INDEX
e.g.deletemed 1 -
Select Medicine :
selectmed INDEX
e.g.selectmed 3 -
Increase Medicine Quantity :
increasemed INDEX mq/QUANTITY
[coming in v2.0]
e.g.increasemed 3 mq/500 -
Decrease Medicine Quantity :
decreasemed INDEX mq/QUANTITY[coming in v2.0]
e.g.decreasemed 2 mq/20
6.7. Appointment Commands
-
Add Appointment :
addappt [d/DATE] [tm/TIME] [tp/TYPE] [ic/NRIC] [n/NAME] [p/PHONE] [e/EMAIL] [a/ADDRESS] [t/TAG]…
e.g.addappt d/01 01 2018 tm/14 30 tp/followup n/Johnny Do ic/D1234567G p/9999999 e/john@email a/Spring Road t/recurringfever -
List Appointment :
listappt [d/DATE]
e.g.listappt d/12 12 2012 -
List All Appointment :
listallappt -
Cancel Appointment :
cancelappt INDEX
e.g.cancelappt 2